1. main.js 에 넣어 기본적인 유효성 검사 실행해보기
먼저, vue 버전에 맞는 vee-validate를 다운로드해준다.
나는 vue 2 에서 구현할 것이기때문에,
※ vee validate를 다운로드 했는데, vee-validate 가 작동하지 않는다면, 버전이 잘못된것이다. 그래서 본인 vue에 맞는 vee-validate를 다운로드 해야한다.
npm install vee-validate@"<3.0.0" --save
로 다운로드 해준다.
main.js
import Vue from "vue";
import App from "./App.vue";
import router from "./router";
import store from "./store";
import VeeValidate from "vee-validate";

Vue.use(VeeValidate);
Vue.prototype.$axios = axios;
Vue.config.productionTip = false;

new Vue({
  router,
  store,
  render: (h) => h(App),
}).$mount("#app");
이렇게 vee-validate를 추가해준다. 그러면, 모든 component 에서 사용이 가능해진다.
MemberRegisterView.vue
<template>
<b-container fluid>
<h1>Sign Up</h1>
<b-form>
<b-form-group
label="Email"
label-for="email">
<b-form-input
type="email"
id="email"
placeholder="Enter email address"
v-model="user.email"
v-validate="'required|email'"
name="email" />
<span class="warningText">{{ errors.first('email') }}</span>
</b-form-group>
<b-button
variant="primary"
@click="handleRegister">
Sign Up
</b-button>
</b-form>
</b-container>
</template>
<style scoped>
h1 {
margin-bottom: 1.5rem;
}
.warningText {
color: crimson;
}
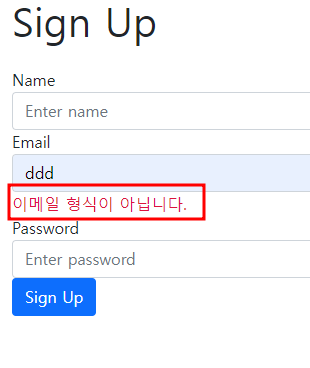
</style>이렇게 input 박스에 v-validate="'required|email'" 을 넣어주고, name값에 email 유효성을 봐주고 만약, 그 email 유효성에 어긋난다면, 이메일 주소를 맞게 입력해달라는 메시지를 <span> 태그에 넣어줄 것이다.

나는 span 에 class값을 주어서 빨간색으로 보이게 설정해뒀다. 그런데, 영어로 되어있으니, 한글로 바꿔보자!
vee-validate에 설정되어잇는 error message를 customize할 수 있는데, 유효성에 대한 데이터만 따로 빼고 싶어서, utils라는 폴더를 생성해 veevalidateUtils.js 파일을 따로 빼두어 main.js 에 추가해줬다.
main.js
import Vue from "vue";
import App from "./App.vue";
import router from "./router";
import store from "./store";
import VeeValidate from "vee-validate";
import '@/utils/veevalidateUtils'

Vue.use(VeeValidate);
Vue.prototype.$axios = axios;
Vue.config.productionTip = false;

new Vue({
  router,
  store,
  render: (h) => h(App),
}).$mount("#app");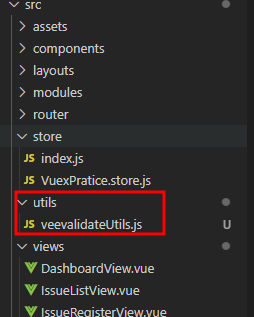
여기서, 아까 말한 이메일 형식에 어긋났을때의 메시지를 수정해 줄 것이다.
veevalidateUtils.js
import {Validator} from 'vee-validate';
import {email} from 'vee-validate/dist/rules.esm' // 기본적으로 제공되는 규칙을 모아둔 파일

// 존재하는 rule의 메세지를 바꾸기위해
Validator.extend('email', {
    ...email,
    getMessage: '이메일 형식이 아닙니다.',
})
// 새로운 rule 추가
존재하는 email 이라는 rule 의 메시지를 변경할 것인데, 여기서 ...email 은 email이라는 객체의 값을 각각 새로운 객체에 복제하는 코드이다. 참고 : https://joshua1988.github.io/es6-online-book/spread-operator.html
해주면,
에러 메시지가 바뀐 것을 확인 할 수 있다.
2. 유효성검사에 어긋나면 다음으로 넘어가지않게 설정
참고: https://vee-validate.logaretm.com/v2/guide/components/validation-observer.html#scoped-slot-data
https://vee-validate.logaretm.com/v2/guide/events.html#disabling-events-validation
$validator 를 이용하자
veevalidateUtils.js
import {Validator} from 'vee-validate';
import {required, email} from 'vee-validate/dist/rules.esm' // 기본적으로 제공되는 규칙을 모아둔 파일
// 존재하는 rule의 메세지를 바꾸기위해
Validator.extend('required', {
...required,
getMessage: '필수 입력 사항입니다.',
})
Validator.extend('email', {
...email,
getMessage: '이메일 형식이 아닙니다.',
})
// 새로운 rule 추가
// 이름
const NAME_MIN = 2
const NAME_MAX = 16
const NAME_REGEX = new RegExp("^[가-힣a-zA-Z]{"+ NAME_MIN + "," + NAME_MAX +"}$")
Validator.extend('name', {
validate(value){
return NAME_REGEX.test(value)
},
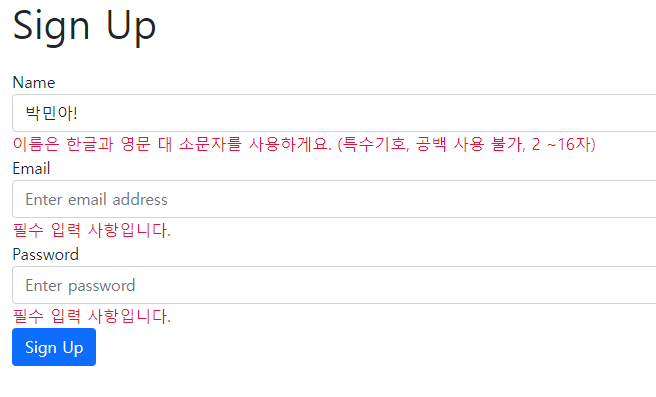
getMessage: `이름은 한글과 영문 대 소문자를 사용하게요. (특수기호, 공백 사용 불가, ${NAME_MIN} ~${NAME_MAX}자)`,
})
// 비밀번호
const PW_MIN = 8
const PW_MAX = 16
const PW_REGEX = new RegExp("^(?=.*?[a-zA-Z])(?=.*?[0-9])(?=.*?[#?!@$%^&*-]).{" + PW_MIN + "," + PW_MAX + "}$")
Validator.extend('pw', {
validate(value){
return PW_REGEX.test(value);
},
getMessage: `비밀번호는 ${PW_MIN}~${PW_MAX}자 영문 대 소문자, 숫자, 특수문자 조합을 사용하세요.`
})MemberRegisterView.vue
<template>
  <b-container fluid>
    <h1>Sign Up</h1>
    <b-form>
      <b-form-group
        label="Name"
        label-for="username">
        <b-form-input
          type="text"
          id="username"
          placeholder="Enter name"
          v-model="user.userName"
          v-validate="'required|name'"
          name="name" />
          <span class="warningText">{{ errors.first('name') }}</span>
      </b-form-group>

      <b-form-group
        label="Email"
        label-for="email">
        <b-form-input
          type="email"
          id="email"
          placeholder="Enter email address"
          v-model="user.email"
          v-validate="'required|email'"
          name="email" />
        <span class="warningText">{{ errors.first('email') }}</span>
      </b-form-group>
      <b-form-group
        label="Password"
        label-for="password">
        <b-form-input
          type="password"
          id="password"
          placeholder="Enter password"
          v-model="user.password"
          v-validate="'required|pw'"
          name="pw" />
          <span class="warningText">{{ errors.first('pw') }}</span>
      </b-form-group>
      <b-button
        variant="primary"
        @click.prevent="handleRegister">
        Sign Up
      </b-button>
    </b-form>
  </b-container>
</template>

<script>

export default {
  name: "MemberRegisterView",
  data() {
    return {
      user: {},
      submitted: false,
      successful: false,
      message: "",
    };
  },
  methods: {
   async handleRegister() {
      const validForm = await this.$validator.validateAll();
      console.log(this.$validator)
      console.log(validForm)
      if(!validForm) return alert('내용을 한번 더 확인해주세요')
      else{
        this.$store.dispatch("loginModule/signUp", this.user)

      }
    },
  },
};
</script>

<style scoped>
h1 {
  margin-bottom: 1.5rem;
}
.warningText {
  color: crimson;
}
</style>
script 부분에,
this.$validator 를 콘솔에 찍을걸 확인해보면,
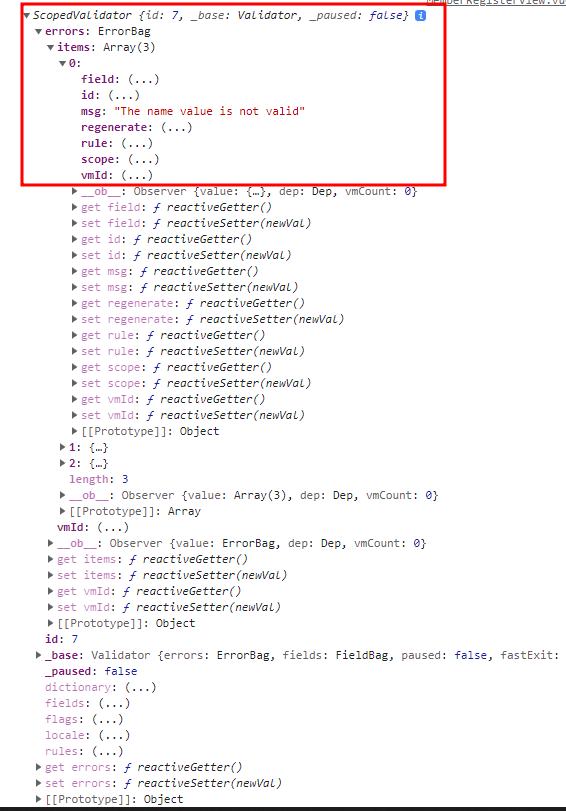
이런식으로, ErrorBag 이라는 객체가 들어있는데 그 객체는 길이가 3인 Array 로 되어있다.
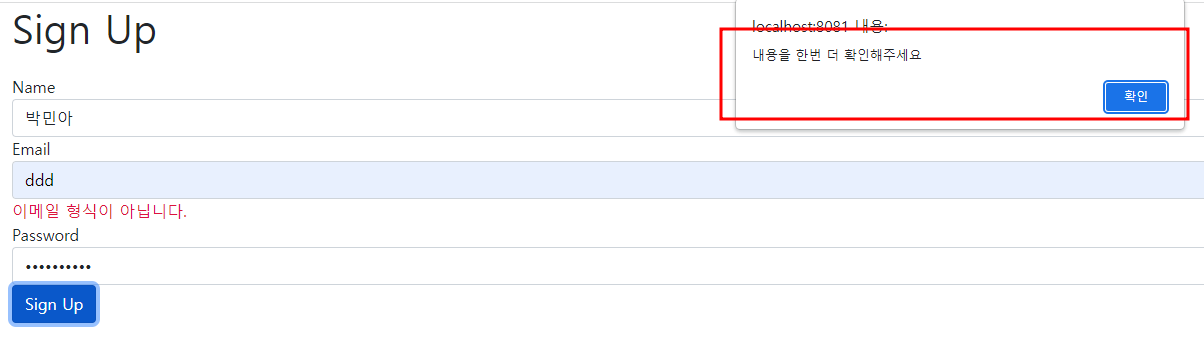
이런식으로 validate 가 false 이면, alert창이 뜬다.
'웹앱프로젝트 > Vue.js' 카테고리의 다른 글
| 외부 vue 프로젝트 서버 실행하기 (0) | 2023.04.25 |
|---|---|
| Spring Boot + Vue.js (JWT 이용한 로그인 구현 Part1) (0) | 2022.09.04 |
| Vuex 이용한 회원가입 구현 (vuex actions context의 사용) (0) | 2022.08.29 |
| Vuex의 actions, modules 기본실습 ( + promise, async/await 설명) (0) | 2022.08.18 |
| Vuex의 state, getters, mutations 기본실습 (2) | 2022.08.07 |